(Created page with "Una vez que se haya iniciado el puente de Air Navigation en X-Plane:") |
(Created page with "* asegúrese de tener su iPad/iPhone y su PC conectados a la <u>'''misma'''</u> red wifi; * asegúrese de activar el sensor '''X-Plane Flight Simulator''' en el menú «Tools...") |
||
| Line 54: | Line 54: | ||
Una vez que se haya iniciado el puente de Air Navigation en X-Plane: | Una vez que se haya iniciado el puente de Air Navigation en X-Plane: | ||
| − | * | + | * asegúrese de tener su iPad/iPhone y su PC conectados a la <u>'''misma'''</u> red wifi; |
| − | * | + | * asegúrese de activar el sensor '''X-Plane Flight Simulator''' en el menú «Tools». |
| − | <br/> | + | <br /> |
[[File:Xplane_1.jpg|155px]][[File:Xplane_2.jpg|155px]][[File:Xplane_3.jpg|155px]] | [[File:Xplane_1.jpg|155px]][[File:Xplane_2.jpg|155px]][[File:Xplane_3.jpg|155px]] | ||
| − | <br/> | + | <br /> |
---- | ---- | ||
===Troubleshooting=== | ===Troubleshooting=== | ||
| − | + | Probar la conexión de X-Plane y Air Navigation Pro | |
| − | * | + | * Iniciar X-Plane |
| − | * | + | * Iniciar Plugin (Plugin – Air Navigation – Start Air Navigation bridge) |
| − | * | + | * Ver información (Plugin – Plugin Admin – Plugin Information) Air Navigation (Enabled) |
| − | * | + | * Iniciar Air Navigation Pro |
| − | * | + | * Activar conexión (Tools – Sensors – X-Plane Flight simulator – Sensor – ON) |
| − | * | + | * Esperar 30 segundos. |
<br /> | <br /> | ||
| − | + | Si el indicador está en verde, ya se puede utilizar X-Plane y Air Navigation Pro. Si no, verificar la conexión Wi-Fi y la instalación Bonjour. | |
<br /> | <br /> | ||
<br /> | <br /> | ||
| − | + | Verificar la conexión Wi-Fi | |
| − | * | + | * Iniciar Air Navigation Pro |
| − | * | + | * Activar el Web Server (Configuration – Settings – Enable web server) |
| − | * | + | * Conectar al Web Server (Escribir el URL del sitio en el buscador) |
<br /> | <br /> | ||
| − | Air Navigation Pro | + | Web Server de Air Navigation Pro desplegado? |
| − | * | + | * Si y la conexión X-Plane funciona - Listo para utilizar X-Plane y Air Navigation Pro |
| − | * | + | * Si pero la conexión X-Plane se perdió - Verificar la instalación Bonjour |
* No: | * No: | ||
| − | ** | + | ** Está activada la conexión Wifi en el dispositivo? |
| − | ** | + | ** Están en la misma red ambos dispositivos (dispositivo iOS y computadora de escritorio)? |
| − | ** | + | ** Verificar la instalación Bonjour |
<br /> | <br /> | ||
| − | + | Verificar la instalación Bonjour | |
| − | * | + | * Instalar Safari en la computadora (para Windows) (https://support.apple.com/downloads/safari) |
| − | * | + | * Iniciar Safari |
| − | * | + | * En Mac – activar Bonjour |
| − | * | + | * Iniciar Air Navigation Pro |
| − | * | + | * Activar Web Server (Configuration – Settings – Enable web server) |
| − | * | + | * Ver en la lista de Bonjour el server Air Navigation Pro |
<br /> | <br /> | ||
[[File:X-Plane2.png]] | [[File:X-Plane2.png]] | ||
| Line 99: | Line 99: | ||
---- | ---- | ||
<br /> | <br /> | ||
| − | + | Volver a la <u>[[Simulators/es|página anterior.]]</u> | |
<br /> | <br /> | ||
| − | [[Category:Simulators]] | + | [[Category:Simulators/es]] |
Revision as of 22:30, 19 October 2016
Android version
There are no bridges programmed on the Android version of Air Navigation Pro.
However, there is an Android App named "X-Plane to GPS" that can be acquired through the Play Store and it will allow users bridge Air Navigation Pro with the X-Plane simulator.
You just have to:
- Search for "X-plane to GPS" app in the Play Store.
- Download it.
- Follow instructions to get GPS signal from X-Plane.
- Run Air Navigation Pro.
Here's a link to the page of "X-Plane to GPS" App:
https://play.google.com/store/apps/details?id=com.appropel.xplanegps
iOS version
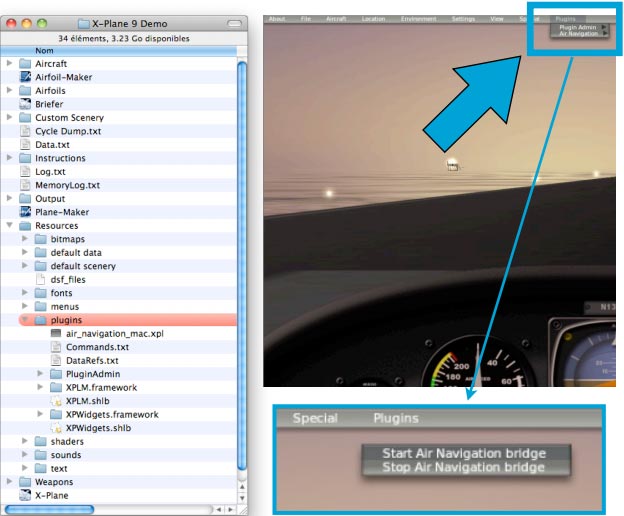
In order to connect Air Navigation Pro to the X-Plane Flight Simulator, a special plugin must be installed in the «plugin» folder of X-Plane.
El plugin para Mac o Windows puede descargarse desde nuestro sitio al final de esta página:
http://airnavigation.aero/support
El plugin «Air Navigation_mac.xpl» o «Air Navigation_win.xpl» deben ser copiados en la carpeta «Resources/Plugins» dentro de la carpeta de X-Plane. Si el plugin fue instalado correctamente, se debería ver «Air Navigation» en el menú «Plugins» de X-Plane, que se encuentra en la barra superior al comenzar un vuelo.
Una vez que el plugin haya sido identificado en X-Plane, clickee en «Start Air Navigation bridge», en el menú «Plugins».
En computadoras Mac utilizamos la función "Bonjour" para encontrar X-Plane en la red.
En computadoras Windows, el servicio “Bonjour” es necesario para la detección automática de la dirección de red de X-Plane por el iPhone o iPad. Si usted ya tiene instalado iTunes no es necesario hacer nada, ya que Bonjour viene con iTunes automaticamente.
Para descargar el servicio Bonjour para Windows, siga este link:
https://support.apple.com/kb/DL999?viewlocale=en_US&locale=es_LA
Descargue el instalador y siga las instrucciones en pantalla.
Una vez que se haya iniciado el puente de Air Navigation en X-Plane:
- asegúrese de tener su iPad/iPhone y su PC conectados a la misma red wifi;
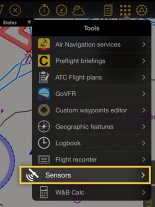
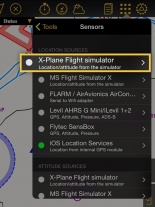
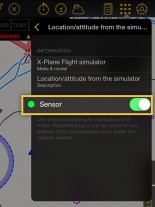
- asegúrese de activar el sensor X-Plane Flight Simulator en el menú «Tools».
Troubleshooting
Probar la conexión de X-Plane y Air Navigation Pro
- Iniciar X-Plane
- Iniciar Plugin (Plugin – Air Navigation – Start Air Navigation bridge)
- Ver información (Plugin – Plugin Admin – Plugin Information) Air Navigation (Enabled)
- Iniciar Air Navigation Pro
- Activar conexión (Tools – Sensors – X-Plane Flight simulator – Sensor – ON)
- Esperar 30 segundos.
Si el indicador está en verde, ya se puede utilizar X-Plane y Air Navigation Pro. Si no, verificar la conexión Wi-Fi y la instalación Bonjour.
Verificar la conexión Wi-Fi
- Iniciar Air Navigation Pro
- Activar el Web Server (Configuration – Settings – Enable web server)
- Conectar al Web Server (Escribir el URL del sitio en el buscador)
Web Server de Air Navigation Pro desplegado?
- Si y la conexión X-Plane funciona - Listo para utilizar X-Plane y Air Navigation Pro
- Si pero la conexión X-Plane se perdió - Verificar la instalación Bonjour
- No:
- Está activada la conexión Wifi en el dispositivo?
- Están en la misma red ambos dispositivos (dispositivo iOS y computadora de escritorio)?
- Verificar la instalación Bonjour
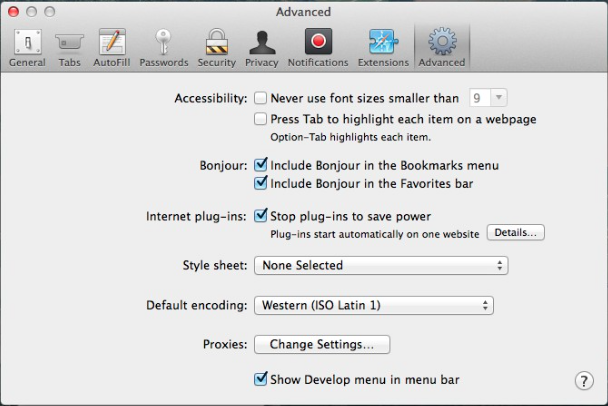
Verificar la instalación Bonjour
- Instalar Safari en la computadora (para Windows) (https://support.apple.com/downloads/safari)
- Iniciar Safari
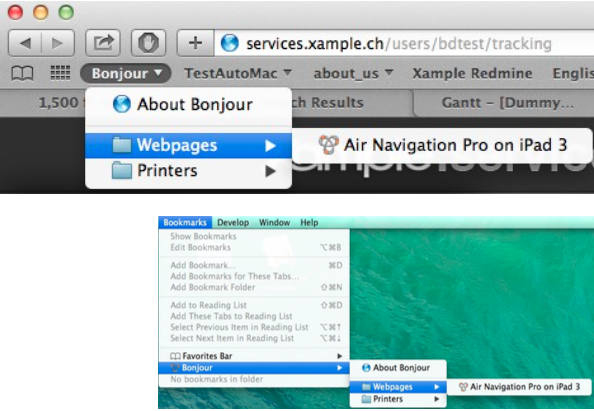
- En Mac – activar Bonjour
- Iniciar Air Navigation Pro
- Activar Web Server (Configuration – Settings – Enable web server)
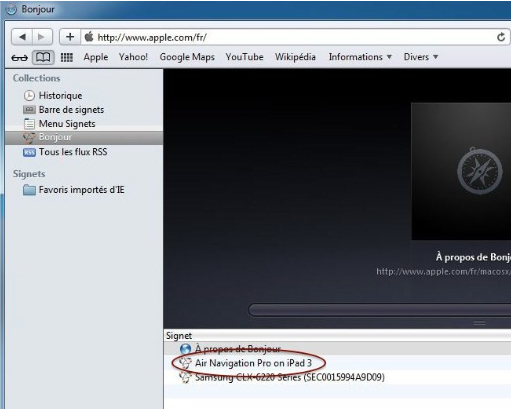
- Ver en la lista de Bonjour el server Air Navigation Pro
Volver a la página anterior.
