(Created page with "<languages /> <translate> <!--T:18--> <br /> ---- __TOC__ <br /> == Android version == <!--T:31--> <br /> There are no bridges programmed on the Android version of Air Naviga...") |
|||
| Line 23: | Line 23: | ||
<br /> | <br /> | ||
<br /> | <br /> | ||
| − | |||
---- | ---- | ||
<br /> | <br /> | ||
Revision as of 18:54, 17 May 2016
Android version
There are no bridges programmed on the Android version of Air Navigation Pro.
However, there is an Android App named "X-Plane to GPS" that can be acquired through the Play Store and it will allow users bridge Air Navigation Pro with the X-Plane simulator.
You just have to:
- Search for "X-plane to GPS" app in the Play Store.
- Download it.
- Follow instructions to get GPS signal from X-Plane.
- Run Air Navigation Pro.
Here's a link to the page of "X-Plane to GPS" App:
https://play.google.com/store/apps/details?id=com.appropel.xplanegps
iOS version
In order to connect Air Navigation Pro to the X-Plane Flight Simulator, a special plugin must be installed in the «plugin» folder of X-Plane.
The Plug-in for Mac or Windows can be downloaded from our site at the bottom of this page:
http://airnavigation.aero/support
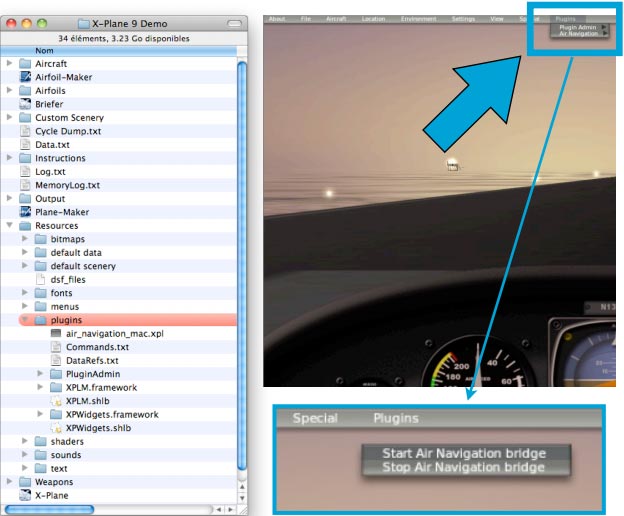
The plugin «Air Navigation_mac.xpl» or «Air Navigation_win.xpl» must be copied to the «Resources/Plugins» folder inside the X-Plane folder. If the plugin is correctly installed, you should see «Air Navigation» in the «Plugins» menu of X-Plane, located at the top bar when starting a flight.
Once you have identified the plugin on X-Plane, then click on «Start Air Navigation bridge», located within «Plugins» top menu as mentioned before.
On Mac computers we use the "Bonjour" feature to discover X-Plane on the network, this is much easier than typing network addresses.
On Windows computers the “Bonjour” service is required for the automatic detection of X-Plane network address by the iPhone or iPad. If you have already installed iTunes you don’t have to do anything, since Bonjour comes with iTunes automatically.
To download and install the Bonjour service for Windows manually go to the following address:
https://support.apple.com/kb/DL999?viewlocale=en_US&locale=es_LA
Download the installer and follow on-screen instructions.
Once you have started the Air Navigation bridge on the X-Plane:- make sure you have your iPad/iPhone and your PC connected to the same wifi network;
- make sure to switch the X-Plane Sensors ON in the «Tools» menu.
Troubleshooting
Test X-Plane and ANP connexion
- Start X-Plane simulation
- Start Plugin (Plugin – Air Navigation – Start Air Navigation bridge)
- View info (Plugin – Plugin Admin – Plugin Information) Air Navigation (Enabled)
- Start ANP
- Enable Connexion (Tools – Sensors – X-Plane Flight sim – Sensor – ON)
- Wait 30s
If Indicator is green, enjoy with X-Plane and ANP. If not test Wi-Fi connection and Test Bonjour installation.
Test Wi-Fi connection
- Start ANP
- Enable web server (Configuration – Settings – Enable web server)
- Connect to the web server (Type the web site URL address in your favorite browser)
ANP WebServer displayed?
- Yes and X-Plane connexion work - Enjoy with X-Plane and ANP
- Yes but X-Plane connexion lost - Test Bonjour installation
- No:
- Is the Wifi enabled on the device?
- Are both devices (iOS device and Desktop computer) on the same network?
- Test Bonjour installation
Test Bonjour installation
- Install Safari on your desktop (for windows users) (https://support.apple.com/downloads/safari)
- Run Safari
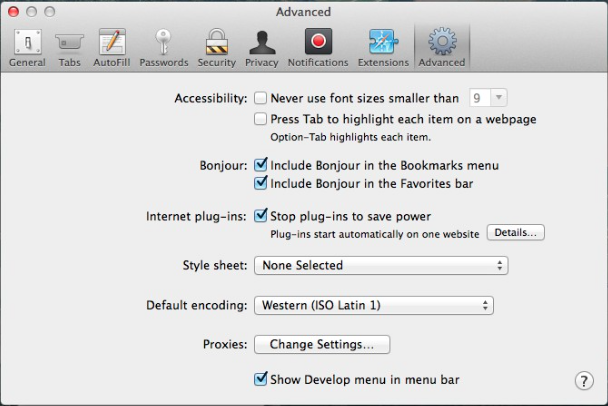
- On mac if necessary – enable Bonjour display
- Start ANP
- Enable web server (Configuration – Settings – Enable web server)
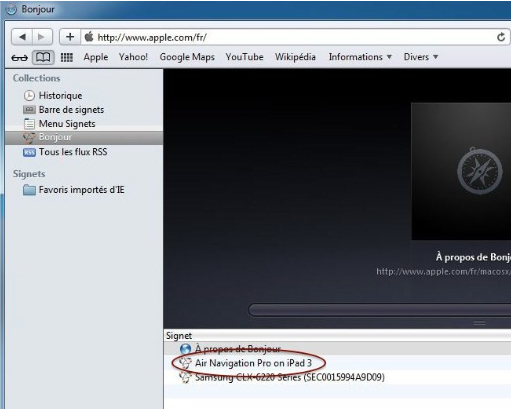
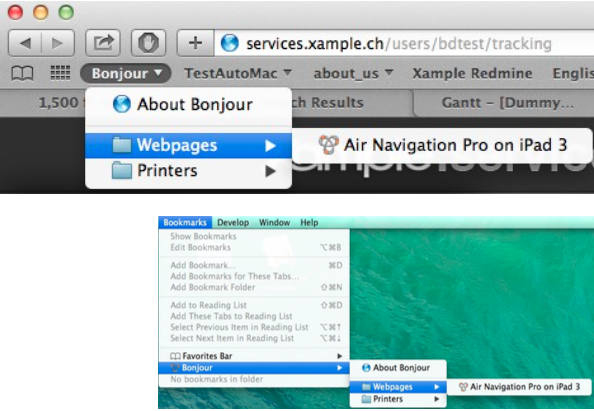
- See on Bonjour list ANP Server
Back to previous page.


