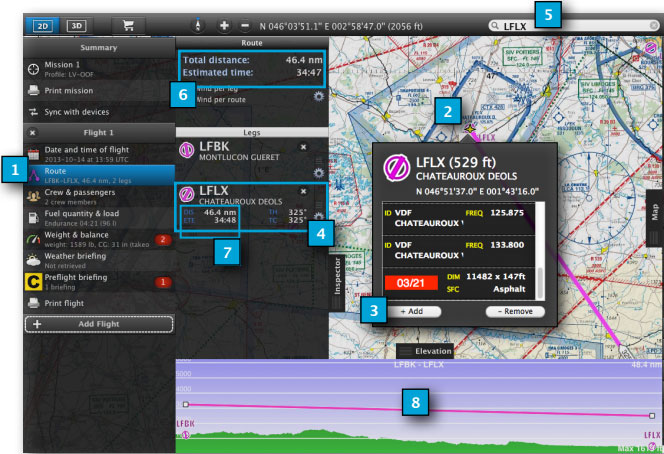
Estos son los pasos a seguir para crear una ruta en Air Navigation Desktop:
- En la pestaña “Mission”, seleccionar el módulo «Route»
- Elegir un waypoint del mapa que se desee agregar a la ruta
- Seleccionar el botón «Add» de la ventana emergente
- El waypoint será agregado a la lista de la ruta
- Como alternativa, se puede agregar un waypoint a través del campo de búsqueda
- La distancia total y el tiempo estimado aparece en la parte superior del módulo de ruta
- La distancia parcial y el tiempo estimado por pierna/tramo se muestra en la esquina izquierda de cada waypoint
- La ruta puede también ser representada en el gráfico de terreno.
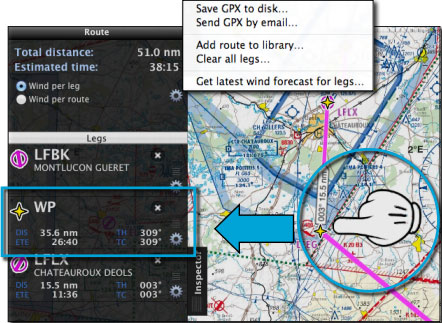
From the top, there’s a menu available with these options:
- Save as GPX file to disc
- Send GPX file by Email
- Add route to the Library TAB
- Clear route
- Get latest wind forecast
You can add mid waypoints to a route using the mouse to press, hold and move the leg to a position in the map.
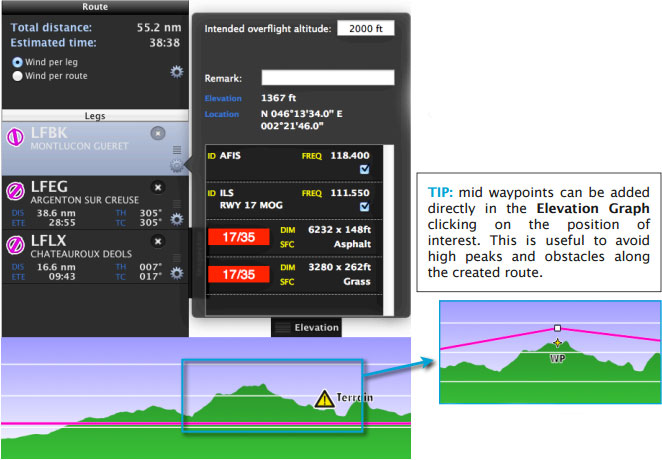
You can have access to a window with info for each waypoint in the route module. Remarks can be added there and the intended overflight altitude can be set, too.
Levels restrictions are set from Map TAB > Elevation module.
Back to index


