Voici les étapes pour créer un itinéraire sur Air Nav Desktop:
- Sélectionnez le module «Route» à partir de l'onglet “Mission”
- Choisissez sur la carte le waypoint que vous désirez ajouter à l’itinéraire
- Cliquez sur le bouton «Add» de la fenêtre pop-up
- Le waypoint sera ajouté à la liste de l’itinéraire
- Alternativement, il est possible d’y ajouter un waypoint en utilisant le champ de recherche
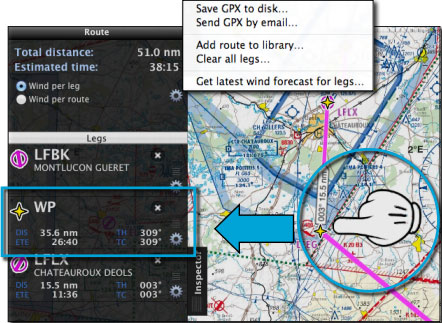
- La distance totale et le temps estimé sont affichés dans la partie supérieure du module “Route”
- La distancie partielle et le temps estimé par vecteur magenta est affiché dans le coin gauche de chaque waypoint
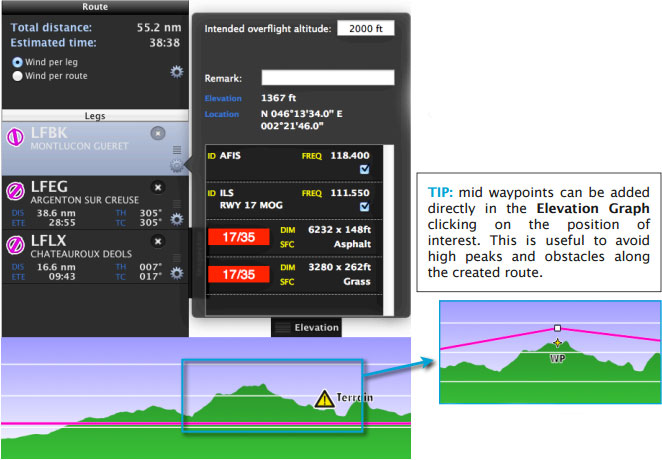
- L’itinéraire peut être représenté dans le graphique du terrain
From the top, there’s a menu available with these options:
- Save as GPX file to disc
- Send GPX file by Email
- Add route to the Library TAB
- Clear route
- Get latest wind forecast
You can add mid waypoints to a route using the mouse to press, hold and move the leg to a position in the map.
You can have access to a window with info for each waypoint in the route module. Remarks can be added there and the intended overflight altitude can be set, too.
Levels restrictions are set from Map TAB > Elevation module.
Back to index

