Here are the steps to follow in order to create a route in Air Nav Desktop:
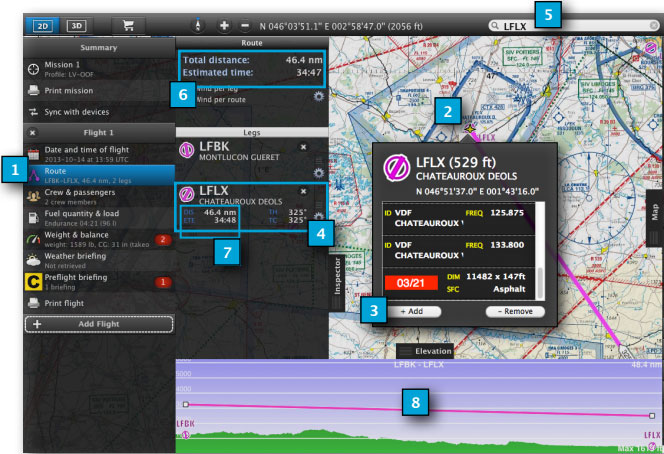
- Within the Mission TAB, select the Route module
- Choose a waypoint from the map that you wish to add to the route
- Click on «Add» button from the popup window
- The waypoint will be added to the Route list
- As an alternative, you can add a waypoint to the route through the search field
- Total distance and estimated time shows on the top of the Route module
- Partial distance and estimated times per leg show on each waypoint
- The route will be also represented in the elevation graph
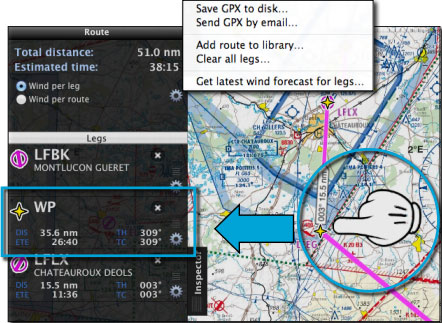
From the top, there’s a menu available with these options:
- Save as GPX file to disc
- Send GPX file by Email
- Add route to the Library TAB
- Clear route
- Get latest wind forecast
You can add mid waypoints to a route using the mouse to press, hold and move the leg to a position in the map.
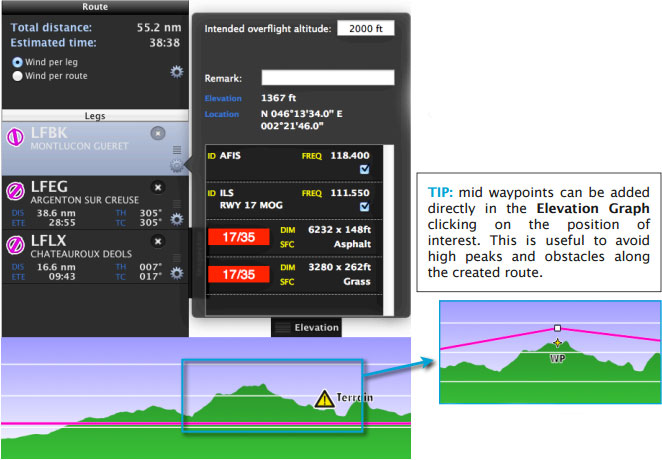
You can have access to a window with info for each waypoint in the route module. Remarks can be added there and the intended overflight altitude can be set, too.
Levels restrictions are set from Map TAB > Elevation module.
Back to index


