(Updating to match new version of source page) |
|||
| Line 15: | Line 15: | ||
En la parte superior de la pantalla, se mostrará un indicador de '''Rumbo'''. En la esquina inferior izquierda estará el perfil de elevación. | En la parte superior de la pantalla, se mostrará un indicador de '''Rumbo'''. En la esquina inferior izquierda estará el perfil de elevación. | ||
| − | + | <nowiki>*</nowiki> When pressing the retract button you'll be able to see the route and the moving map on the left side. To hide these, just press the expand button. | |
| − | |||
| − | |||
| − | |||
---- | ---- | ||
| Line 28: | Line 25: | ||
En este modo se puede navegar libremente a través del terreno 3D: | En este modo se puede navegar libremente a través del terreno 3D: | ||
| − | * | + | * Touching the screen and dragging up or down will change the pitch. |
| − | * | + | * Touching the screen and dragging left or right will change the heading. |
| − | * | + | * Touching the altitude bar and dragging up or down will change the altitude. |
| − | * | + | * By touching on the left edge of the EFIS and dragging up or down you can move forward or backwards |
<br /> | <br /> | ||
| − | [[File:calibrate.jpg|90px]] | + | [[File:calibrate.jpg|90px]] Press it and a menu will open. You will be able to calibrate the attitude and the offset. |
[[File:gmini.jpg|90px]] Aparecerá cuando se esté conectado con un AHRS G mini. | [[File:gmini.jpg|90px]] Aparecerá cuando se esté conectado con un AHRS G mini. | ||
Revision as of 18:07, 4 April 2016
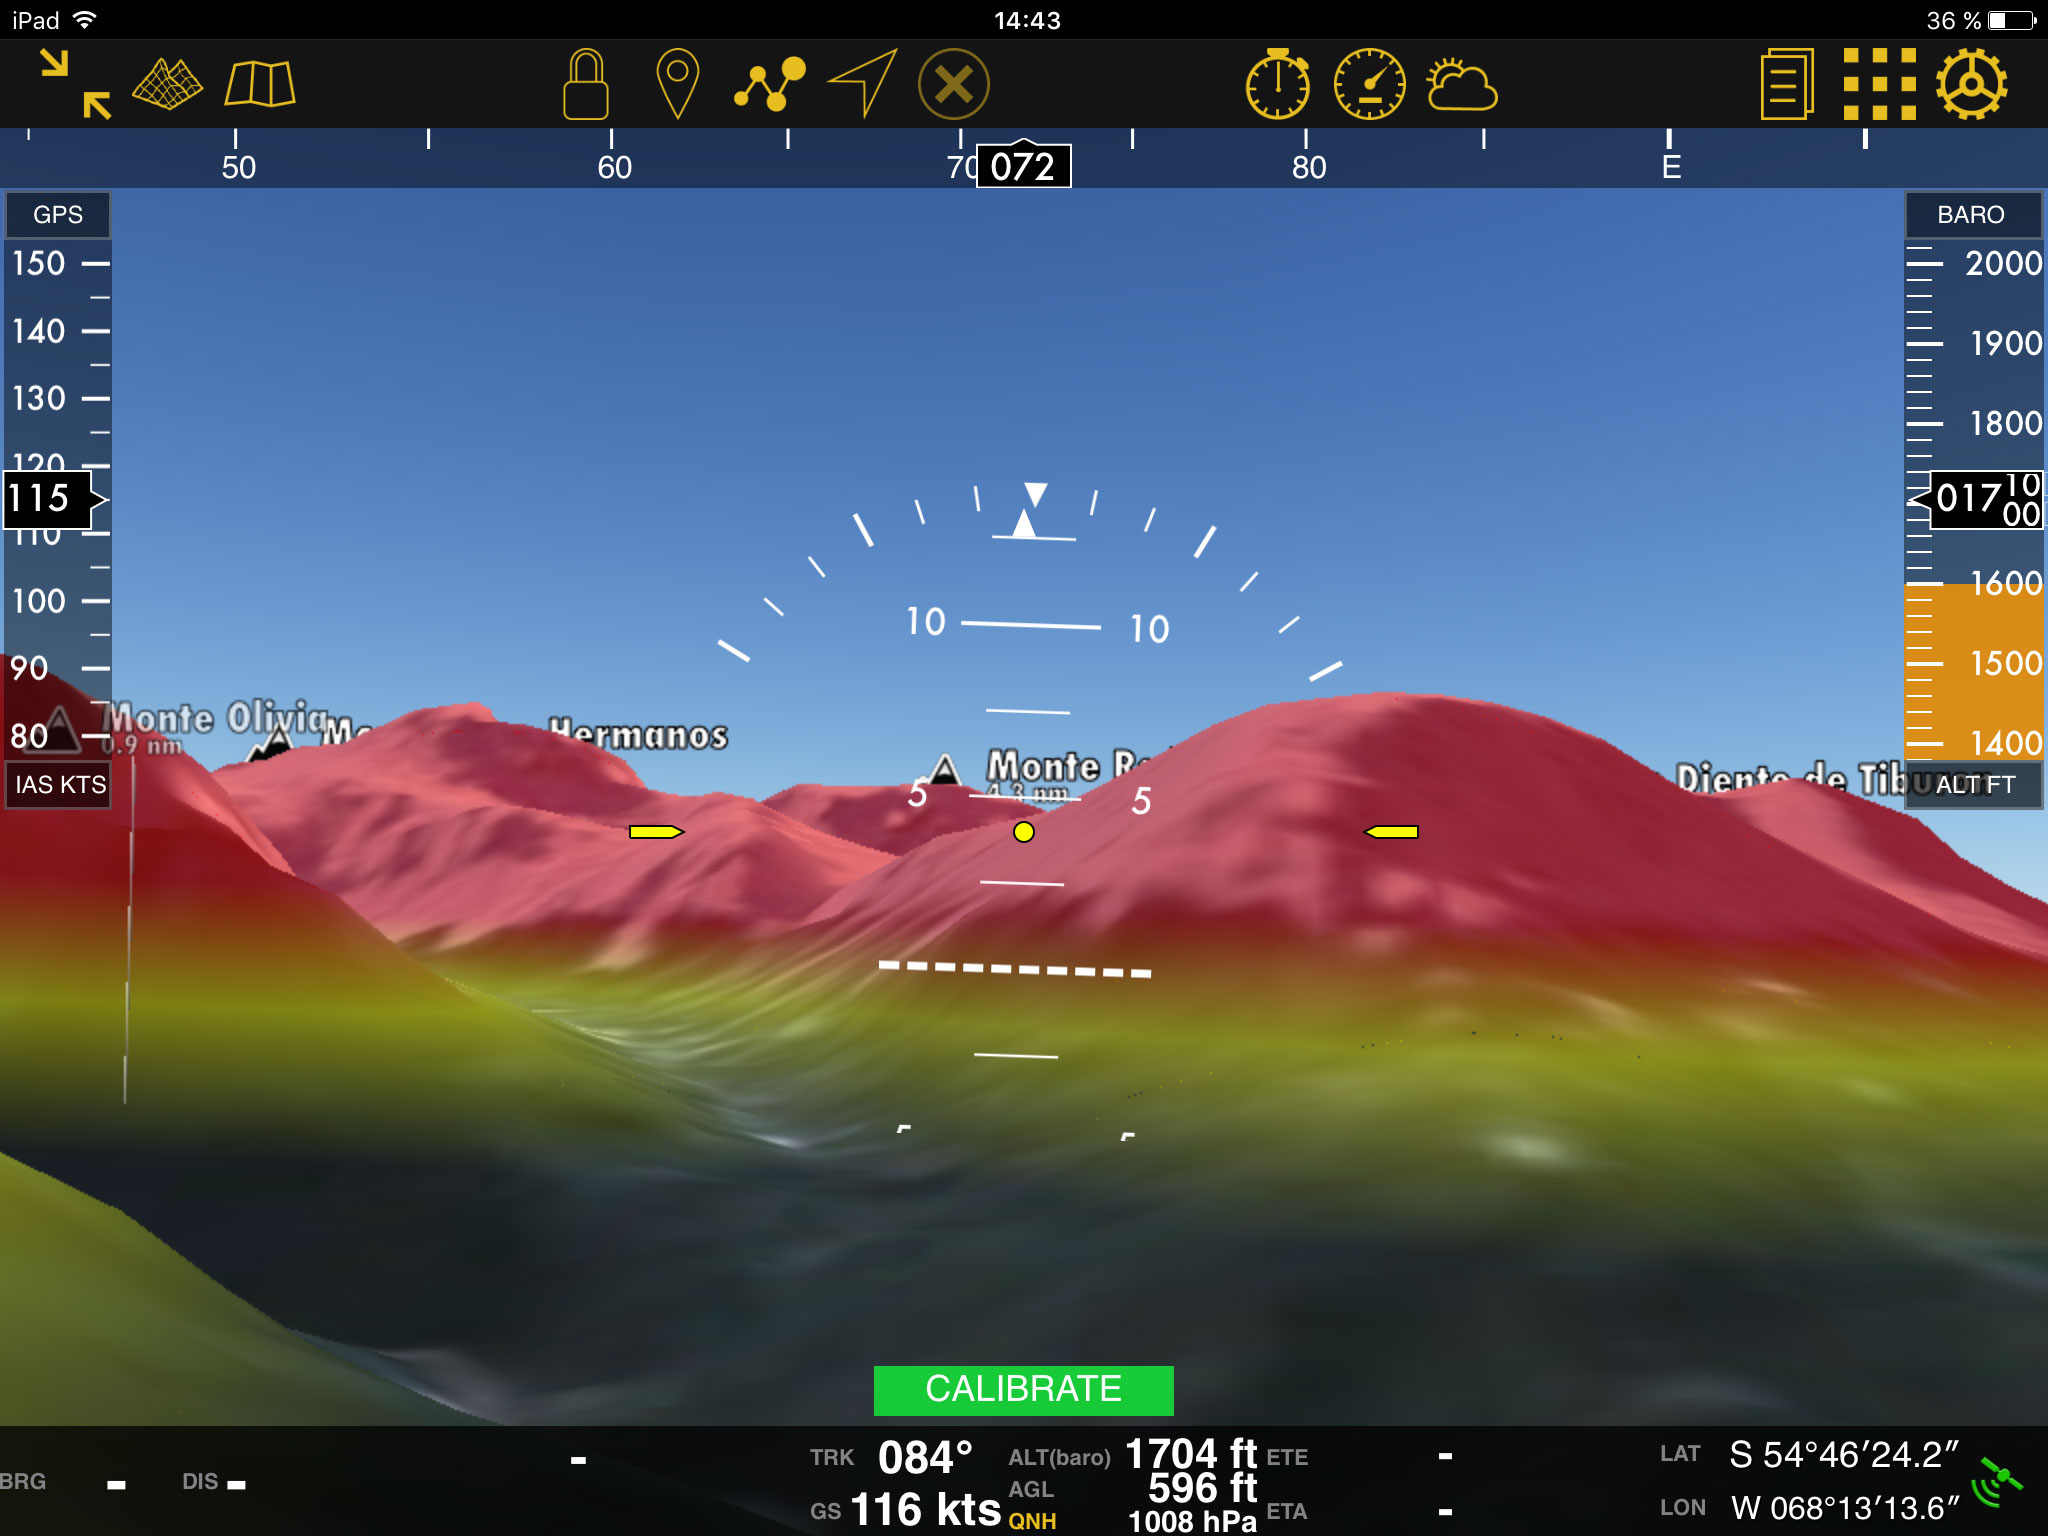
El módulo EFIS exhibe el terreno en 3D durante el vuelo. Para utilizarlo, primero tendrá que descargar los datos 3D desde el Map Store. Estos datos son muy complejos y funcionan para el módulo EFIS y para el Gráfico de Elevación. Esto significa que, una vez que lo ha instalado en Air Navigation Pro, no será necesario instalar los datos de elevación.
Visualización
Para entrar en el módulo EFIS, necesitará activar los, previamente instalados, mapas 3D de su elección y presionar el botón del módulo EFIS, el cuál se encuentra en la barra de herramientas superior.
Se mostrará un indicador de velocidad de suelo en la izquierda y un indicador de altitud a la derecha.
En la parte superior de la pantalla, se mostrará un indicador de Rumbo. En la esquina inferior izquierda estará el perfil de elevación.
* When pressing the retract button you'll be able to see the route and the moving map on the left side. To hide these, just press the expand button.
Diferentes modos y calibración
Usted podrá ver lo siguiente:
![]() Se mostrará cuando sea presionado el botón Modo editar.
Se mostrará cuando sea presionado el botón Modo editar.
En este modo se puede navegar libremente a través del terreno 3D:
- Touching the screen and dragging up or down will change the pitch.
- Touching the screen and dragging left or right will change the heading.
- Touching the altitude bar and dragging up or down will change the altitude.
- By touching on the left edge of the EFIS and dragging up or down you can move forward or backwards
![]() Press it and a menu will open. You will be able to calibrate the attitude and the offset.
Press it and a menu will open. You will be able to calibrate the attitude and the offset.
![]() Aparecerá cuando se esté conectado con un AHRS G mini.
Aparecerá cuando se esté conectado con un AHRS G mini.
![]() Aparecerá mientras Air Nav Pro esté conectado con el X-Plane.
Aparecerá mientras Air Nav Pro esté conectado con el X-Plane.
![]() Aparecerá mientras Air Nav Pro esté conectado con el FSX.
Aparecerá mientras Air Nav Pro esté conectado con el FSX.
Problemas comunes
- La actitud está congelada y aparece un botón rojo con el mensaje "Actitud OFF".
- Es posible que el giroscopio interno esté desactivado y que no haya conexión con el sensor AHRS externo. Asegúrese de activarlos a través de "Herramientas - Sensores" debajo del sub-menú "Sensores de actitud".
Volver a la página anterior.

