(Created page with "Par défaut, la carte est centrée sur votre lieu actuel et orientée au Nord. En pressant sur le symbole en haut dans le coin à gauche, vous pouvez basculer entre:") |
|||
| Line 12: | Line 12: | ||
| − | [[File:Image2.jpg|caption|left]] ''''' | + | [[File:Image2.jpg|caption|left]] '''''Orientation Nord''''', lieu actuel au centre de l’écran, suit les mouvements de l’avion. |
| − | <br/> | + | <br /> |
| − | [[File:Image3.jpg|caption|left]] ''''' | + | [[File:Image3.jpg|caption|left]] '''''Orientation dans la direction de vol''''', en rotation pour correspondre à la direction de vol, suit les mouvements de l’avion. |
| − | <br/> | + | <br /> |
| − | [[File:Image4.jpg|caption|left]] '''''Panned mode''''' | + | [[File:Image4.jpg|caption|left]] '''''Panned mode''''', en touchant et déplaçant la carte, celle-ci passe en mode manuel. Dans ce cas, la carte sera déplacée vers le lieu de votre choix, orientée au Nord. Dans ce cas, la carte ne suit plus les mouvements de l’avion, à la place, c’est le symbole de l’avion qui bougera sur la carte. Éventuellement il quittera l’écran.[[File:moving_map2.jpg|caption|right|200px]]Vous pouvez centrer à nouveau la carte et restaurer les mouvements de la carte en pressant une fois sur le symbole en haut dans le coin gauche. |
| − | [[File:moving_map2.jpg|caption|right|200px]] | + | <br /> |
| − | <br/> | + | En touchant une zone interactive sur le carte, une fenêtre apparaîtra avec des informations utiles. Les zones interactives sont: |
| − | + | ||
'''Waypoints:''' ID code, elevation, full name, latitude, longitude, frequency (Navaids), runway and contact frequency info (Airports), geo-referenced app charts. | '''Waypoints:''' ID code, elevation, full name, latitude, longitude, frequency (Navaids), runway and contact frequency info (Airports), geo-referenced app charts. | ||
Revision as of 20:46, 20 October 2015
Il est possible de créer un itinéraire à partir de la carte principale. En plus, vous pouvez ajouter des points de navigation intermédiaires à votre itinéraire de vol (afin d’éviter des mauvaises conditions météorologiques par exemple).
Par défaut, la carte est centrée sur votre lieu actuel et orientée au Nord. En pressant sur le symbole en haut dans le coin à gauche, vous pouvez basculer entre:
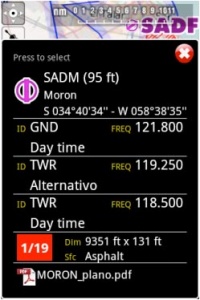
En touchant une zone interactive sur le carte, une fenêtre apparaîtra avec des informations utiles. Les zones interactives sont:
Waypoints: ID code, elevation, full name, latitude, longitude, frequency (Navaids), runway and contact frequency info (Airports), geo-referenced app charts.
Airspaces: lower and upper limits, name, class and additional information. These airspaces are displayed on the map in different colors depending on their class.
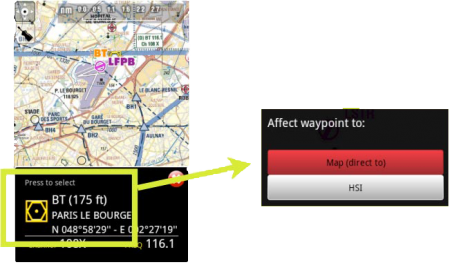
You can press on any of the waypoints in the map to assign it to the HSI instrument or to select it as your destination, by pressing where it says: Press to select
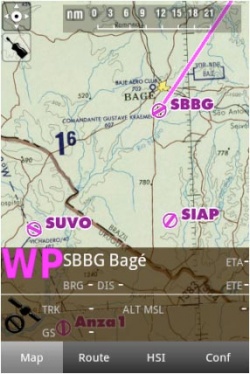
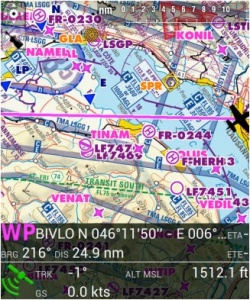
The data bar at the bottom of the moving map will display real-time information. From left to right: ID and name of next waypoint; bearing, track and distance of next waypoint; groundspeed and altitude as reported by the GPS signal, and estimated time to the next waypoint.
The data bar also shows a GPS signal symbol as follows:
Excellent GPS signal
Good GPS signal
Weak GPS signal
Very week GPS signal
For real time navigation, the quality of the GPS signal is required to be a green or yellow symbol. A red or orange symbol will only show an approximate location and will not report speed nor track information.For better results, place your device near a window, with a direct view of the sky. If you are flying with a full-metal airplane or your airplane is equipped with anti-ice windshield, the internal GPS of your tablet/mobile may be a bit weak and you may need an external GPS device to assist it.
Back to index.


