(Importing a new version from external source) |
(Importing a new version from external source) |
||
| Line 74: | Line 74: | ||
[[File:linux.server.jpg]] | [[File:linux.server.jpg]] | ||
| − | * In the "Server" box, enter the code that appears in "Settings - | + | * In the "Server" box, enter the code that appears in <nowiki>"Settings - Network - WebDAV address" (for example: 192.168.1.3) </nowiki> |
| − | + | ||
* In the "Port" box, enter: 9090 | * In the "Port" box, enter: 9090 | ||
* From the dropdown of the "Type" box, select "WebDAV (HTTP)"; | * From the dropdown of the "Type" box, select "WebDAV (HTTP)"; | ||
Latest revision as of 16:18, 1 August 2017
Contents
What's the WebDAV server?
WebDAV is a file server protocol based on the http protocol. It is natively supported by most modern operating systems (Windows, MacOS X, Linux).
It is possible to share and «mount» the «documents» folder of Air Navigation as a network share (server) on your computer by using the WebDAV protocol.
The WebDAV network share is much more practical as it is possible to manipulate files as if they were on a USB key. It is possible to copy several files at the same time and even complete folder structures to Air Navigation.
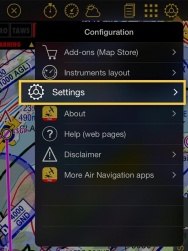
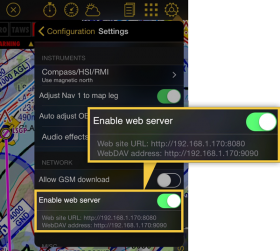
The WebDAV address will appear in the settings, under the Webserver one.
As we do it with the Webserver, by activating the option «Enable web server» (see screenshot above), we can get the IP address below that option. Example: http://192.168.1.46:9090
Connecting to the WebDAV server on Windows
- Open “My Computer” from the Start Menu;
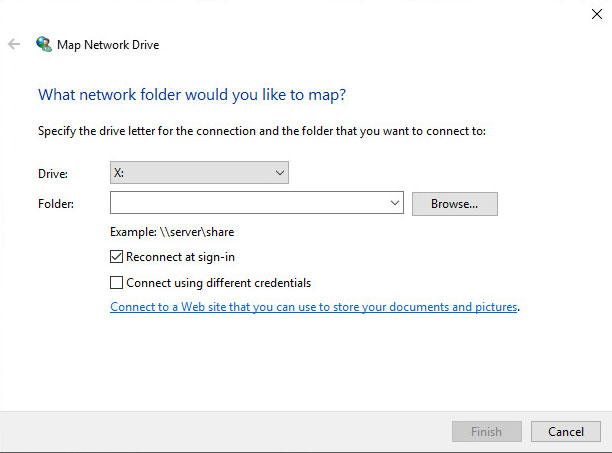
- From the Menu select “Map Network Drive”
(or right-click on “My Computer” and select “Map Network Drive”);
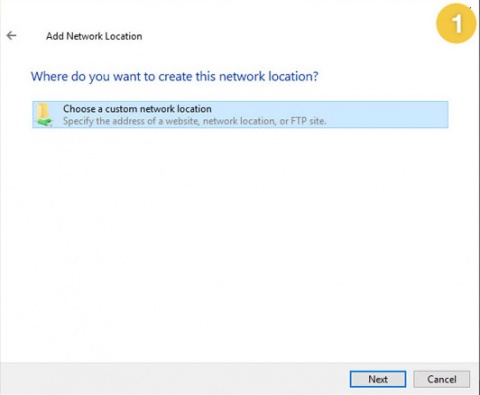
- Use the link on the bottom of the next box: “Sign up for online storage or connect to a network server”;
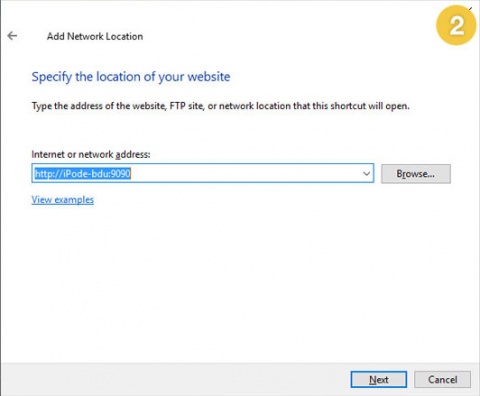
- Follow the network assistant’s procedure and use the network address from Air Navigation settings page. The default address can be for example: http://iPode-bdu:9090 or http://192.168.1.101:9090
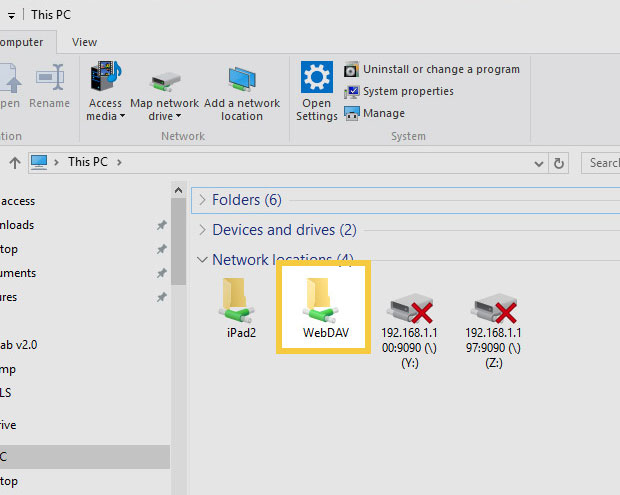
- Choose a name for your iPhone which will appear in the “My Network Places” window later;
- Open the drive like an external hard disk and use it the same way.
Connecting to the WebDAV server on Mac OS X
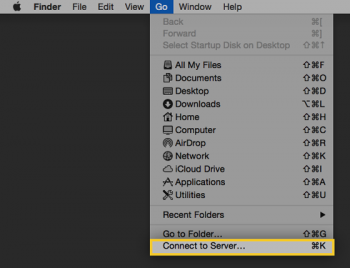
- Select the «Go» menu;
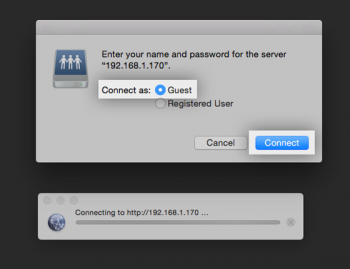
- Select “Connect to Server”;
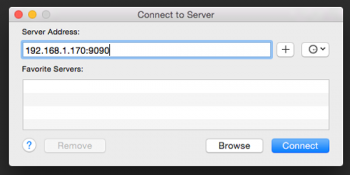
- Enter the network IP address according to Air Navigation Pro:
the default address can be for example: http://192.168.1.12:9090;
- Select the option Connect As: Guest
- The device will appear on the desktop as a hard drive symbol.
Connecting to the WebDAV server on Linux
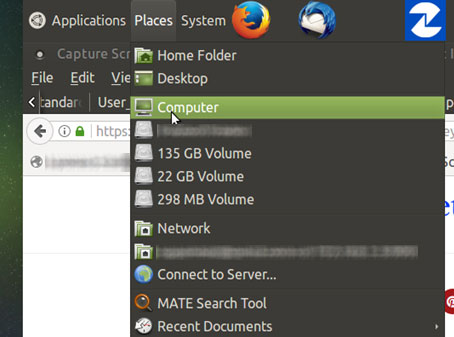
- Open "Places" menu;
- From the menu select "Computer", this will allow you to see the available folders/drivers;
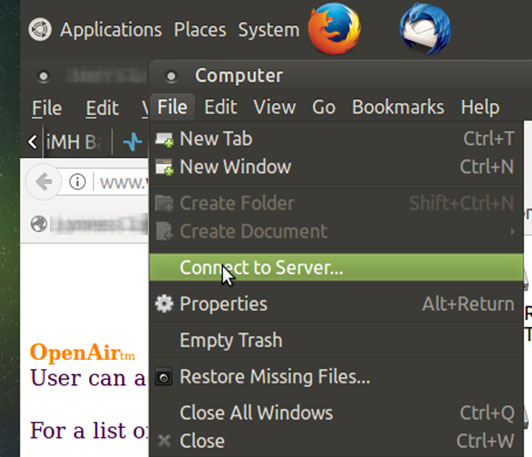
- Tap on "File" and then left click on "Connect to Server";
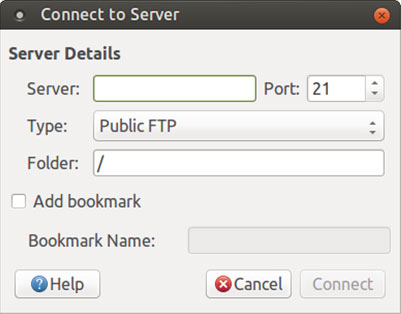
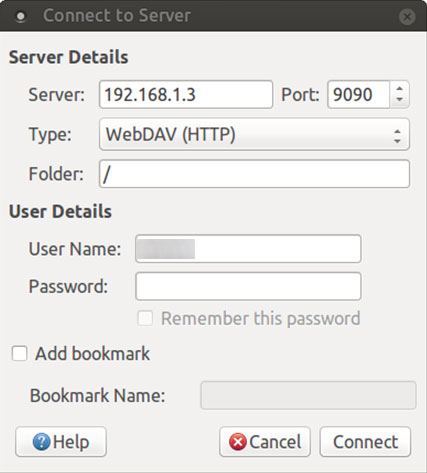
A new window will open up looking like the image below:
- In the "Server" box, enter the code that appears in "Settings - Network - WebDAV address" (for example: 192.168.1.3)
- In the "Port" box, enter: 9090
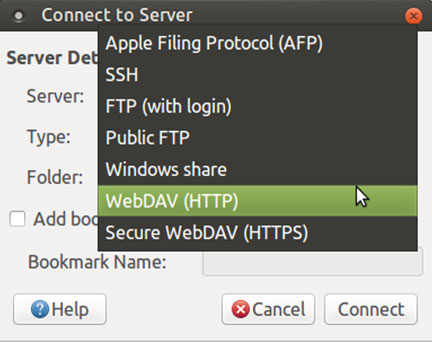
- From the dropdown of the "Type" box, select "WebDAV (HTTP)";
Note: when you choose "WebDAV (HTTP)", the part may automatically change to "80". You have to manually re-enter "9090".
- Enter a username;
- Leave the password box blank;
- Click "Connect".
You will immediately see a link displayed under the “Network” section along the left side of the screen. All the files and folders associated with Air Navigation Pro will be shown.
Note: this was tested on a UbuntuMATE 16.04 Linux desktop computer.
Content of the «Documents» folder
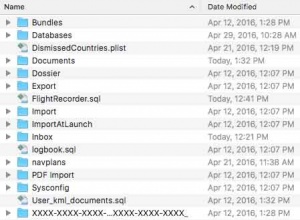
Once mounted as a network drive, you can access and manage files used by Air Navigation.
Deleting, renaming or installing unsupported files may cause the application to malfunction.
The «Documents» folder contains installed maps and charts. They are stored in the «MapPackages» subfolder.
The maps can be backed up to a computer and copied to another device. However, commercial maps are protected with a certificate that will only work on the device where it was created. If you try to install maps on a second device, you will have to do it through the section «All my products» located in the «Map Store» module to create the certificates.
If you want to backup the maps on your computer, you should also backup the certificates. The certificates are located in the folder named with the hexadecimal string (first folder in the screenshot). You should NOT change the name of the folder or the files inside.
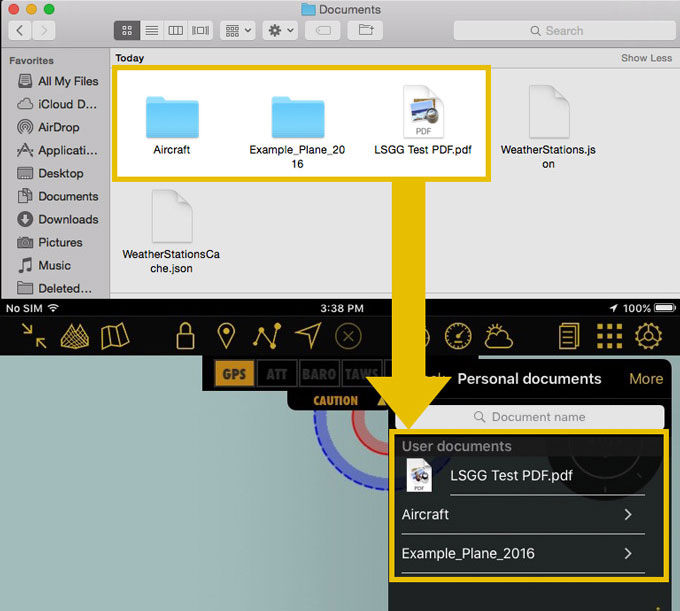
The «databases» folder currently contains only the user database. The user database file is a SQLite file and can be edited by any SQLite 3 editor. This database contains user waypoints, frequencies and runways. They are linked by the waypoint identifier so if you want to input an airport with a runway and some frequencies, the relevant records must have the same value in the «waypoint_id» field. The «Documents» subfolder is where user approach charts and user PDF documents are stored. You can create subfolders inside the «Document» folder. They will appear at the top of the «Documents Browser» module in Air Navigation. The «Airport charts» folder name is reserved for documents linked to an airfield. You can copy documents inside the «Airport charts» folder but they must be grouped in a folder named with the identifier of an airfield, otherwise Air Navigation will ignore them.
The «Elevation» folder is where the free elevation databases are stored. You can backup the elevation files on your computer. You can also copy those files to other devices. The «Logbook.sql» is a SQLite3 database file where the content of Air Navigation's logbook is stored. It can be edited by any SQLite 3 editor. The «Navplans» folder is where saved routes are stored. You can backup and/or copy the files to other devices.
Back to previous page.
