(Created page with "==Überblick== Der Überblick zeigt Name der Route, Abflug- und Zielflugplatz, Anzahl der Flugabschnitte, Entfernung und ETA. Tippen auf dem Überblick öffnet ein neues Fenst...") |
(Created page with "---- <br /> === General === ; Flugdatum 250px : Datum und Abflugzeit für die Route festlegen. ; Luftfahrzeugführer : Pilot für di...") |
||
| Line 48: | Line 48: | ||
<br /> | <br /> | ||
=== General === | === General === | ||
| − | ; | + | ; Flugdatum |
[[File:summary_general.jpg|right|caption|250px]] | [[File:summary_general.jpg|right|caption|250px]] | ||
| − | : | + | : Datum und Abflugzeit für die Route festlegen. |
| − | ; | + | ; Luftfahrzeugführer |
| − | : | + | : Pilot für die Route festlegen. |
| − | ; | + | ; Luftfahrzeug |
| − | : | + | : Luftfahrzeug für die Route festlegen. Sie können ein neues Flugzeugprofil erstellen durch tippen auf "+ Flugzeug hinzufügen...". |
[[File:summary_aircraft.jpg|300px|center]] | [[File:summary_aircraft.jpg|300px|center]] | ||
Revision as of 19:12, 21 July 2017
Das Routeninstrument zeigt die Wegpunkte der erstellten Route. Je nach aktivem App-Modus werden verschiedene Informationen angezeigt. Mit dem Schloss-Symbol auf der oberen linken Ecke können Sie zwischen Modi umschalten
Contents
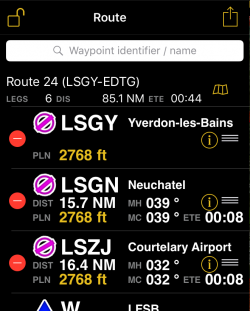
Editiermodus
- Im Editiermodus wird eine Suchleiste oben angezeigt. Sie können Wegpunkte suchen und zur Route hinzufügen. Um mehrere Punkte hinzufügen trennen Sie diese mit einem Leerzeichen.
- Sie werden folgendes sehen:
- Anzahl der Flugabschnitte, Gesamtentfernung und ETE nach die Reisegeschwindigkeit des gewählten Flugzeuges und Wind.
- Kurs (magnetisch oder rechtweisend (Je nach Ihre Einstellungen)) zwischen Abschnitte und Steuerkurs Falls Windinformation im "Überblick" eingegeben wurde.
- Entfernung zwischen Abschnitte
- ETE zwischen Punkte nach Ihre Geschwindigkeit und Windlage.
- Das rote Icon neben den Wegpunkt entfernt diesen aus der Route.
- Tippen auf dem Wegpunkt zentriert diesen auf der Karte.
- Tippen auf dem gelben "I" zeigt weitere Wegpunkt-Informationen und Funktionen.
- Durch tippen und wischen auf die 3 horizontale Linien können Sie die Wegpunkte umordnen.
- Auf dem iPad können Sie mit dem gelben Dreieck in der unteren rechten Ecke das untere Instrument verbergen.
Durch tippen auf dem gelben Zahl neben "PLN" können Sie eine Zielflughöhe einstellen (vor oder nach dem Wegpunkt). Falls eine Flughöhenänderung über den Wegpunkt stattfinden soll, werden 2 Zahlen getrennt durch einen Schrägstrich (/) angezeigt: vor/nach.
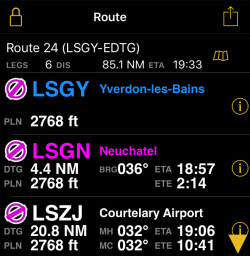
Flugmodus
- Wenn nicht im Editiermodus werden Sie folgendes sehen:
- In Blau; Wegpunkte, die Sie schon überflogen haben
- In Magenta; nächster Wegpunkt
- Entfernung aus Ihrer aktuellen Position zum nächsten Wegpunkt.(DTG)
- Kurs zum nächsten Wegpunt aus Ihrer aktuellen Position
- Geplante Zielflughöhe. Falls eine Flughöhenänderung über den Wegpunkt stattfinden soll, werden 2 Zahlen getrennt durch einen Schrägstrich (/) angezeigt: vor/nach.
- ETA, ETE zum nächsten Wegpunkt und ETE zwischen den aufkommenden Wegpunkte, berechnet mit Ihrer aktuellen Bodengeschwindigkeit.
- Durch Tippen auf einem Wegpunkt aus der Liste können Sie diesen "Als nächsten Routenpunkt einstellen" oder mit einem Instrument verknüpfen.
- Tippen auf dem gelben "I" zeigt weitere Wegpunkt-Informationen und Funktionen.
Überblick
Der Überblick zeigt Name der Route, Abflug- und Zielflugplatz, Anzahl der Flugabschnitte, Entfernung und ETA. Tippen auf dem Überblick öffnet ein neues Fenster mit weiteren Optionen.
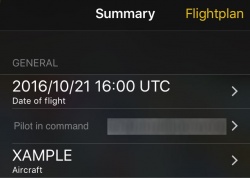
General
- Flugdatum
- Datum und Abflugzeit für die Route festlegen.
- Luftfahrzeugführer
- Pilot für die Route festlegen.
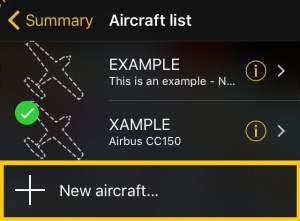
- Luftfahrzeug
- Luftfahrzeug für die Route festlegen. Sie können ein neues Flugzeugprofil erstellen durch tippen auf "+ Flugzeug hinzufügen...".
- Settings
- This settings will apply mainly to the Operational Flightplan
- Round flight time up
- Always round times to the next minute
- Account for climb/descent in time estimate
- Adds time penalties during climbs and bonuses during descents
- Show ETA and date
- Prints date of flight and ETA on the operational flightplan
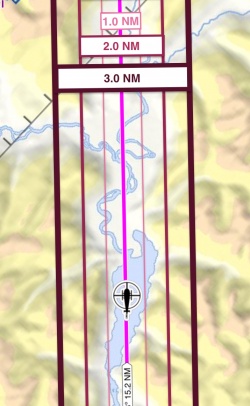
- Corridor width
- Set a corridor width for computing the MSA (Minimum Safe Altitude). The corridor will also be visible as a red area on the Profile View.
- If you set a corridor width of 3NM, Air Navigation Pro will look for the MSA on the area belonging to a corridor of 3NM along the route. Keep in mind, that Air Navigation Pro uses the MSA to calculate the TAS. A higher MSA will mean a higher TAS.
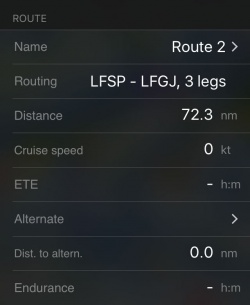
Route
- Name
- By tapping on this field you will be able to change the name of the route.
- Routing
- Departure, Destination and number of legs.
- Distance
- Distance of the Route.
- Cruise speed
- Information taken from the aircraft profile.
- Holding time
- Define a holding time. The time you select will be stored for your destination. The next time you fly to this airport Air Navigation will remember how much you set as "holding time".
- ETE
- ETE calculated with information from the aircraft profile.
- Alternate
- Select an alternate airport for the route.
- Dist. to altern.
- Distance to alternate from last WP from route.
- Endurance
- Calculates endurance once the fuel on board is entered.
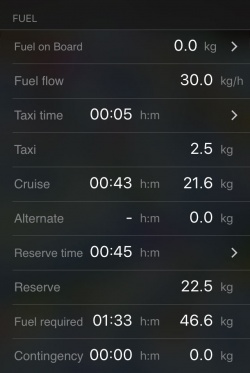
Fuel
- Fuel on Board
- Enter the fuel on board of the aircraft.
- Fuel flow
- Information gathered from the aircraft profile.
- Taxi time
- Sets taxi time.
- Taxi
- Calculates taxi fuel.
- Cruise
- Calculates cruise fuel for route.
- Alternate
- Calculates fuel needed for leg DEST - ALTN.
- Reserve time
- Allows you to set a reserve time (By default 45 mins).
- Reserve
- Calculates fuel for reserve.
- Fuel Required
- Calculates fuel for the trip taking in account taxi, cruise, alternate and reserve time.
- Contingency
- Endurance (Fuel on Board) minus Fuel required.
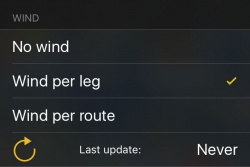
Wind
You can calculate the effect of current wind to your route. For the time being the wind calculates will be only the wind at ground level.
- No wind
- Don't take in account wind for the route.
- Wind per leg
- Downloads from the internet the current winds for your route legs. To push the service tap on the circled arrow at the bottom of this menu. This will take some seconds and the message "Last update: Never" will change to the current time.
- Wind per route
- Enter manually a direction and speed of the wind for the whole route.
Remember that you must download the Free Elevation data in order to calculate the Wind per leg info.
Operational Flightplan
The route created can be converted to a flight log that can be printed out or sent by E-Mail.
Legs
Will display information about the legs of the Route. While flying, it will display the actual distance and bearing to next waypoint.
Pressing the "i" at the right of every WP will show information of the WP and the option to select it or center it on the map.
Sharing
By tapping on the yellow square with the arrow pointing up you will be able to share the created route. You can share the route via:
- AirDrop
- iOS Native apps like Message, Mail or Notes
- Third party apps like Dropbox.
Back to previous page.
