(Created page with "---- We will describe below some cool tips to be taken into account for when flight planning. * '''TIP 1''' : Before creating a route, we always recommend to: # create an Airc...") |
|||
| (4 intermediate revisions by the same user not shown) | |||
| Line 1: | Line 1: | ||
| + | <languages /> | ||
| + | <translate> | ||
| + | <!--T:1--> | ||
| + | <br /> | ||
---- | ---- | ||
| − | + | In this article, we will describe some useful tips to be taken into account for when you are flight planning. | |
* '''TIP 1''' | * '''TIP 1''' | ||
: Before creating a route, we always recommend to: | : Before creating a route, we always recommend to: | ||
| − | + | - Create an Aircraft profile<br/> | |
| − | + | - Assign it to the current Mission.<br/> | |
<br/> | <br/> | ||
[[File:tip1_mac.jpg]] | [[File:tip1_mac.jpg]] | ||
| + | <!--T:2--> | ||
* '''TIP 2''' | * '''TIP 2''' | ||
| − | + | - Always check the red bubbles for each module of a flight. They will give you information about the problem.<br/> | |
<br/> | <br/> | ||
[[File:tip2_mac.jpg]] | [[File:tip2_mac.jpg]] | ||
| + | <!--T:3--> | ||
* '''TIP 3''' | * '''TIP 3''' | ||
| − | + | - Check that your downloaded map is enabled under the Map TAB.<br/> | |
<br/> | <br/> | ||
[[File:tip3_mac.jpg]] | [[File:tip3_mac.jpg]] | ||
| + | <!--T:4--> | ||
* '''TIP 4''' | * '''TIP 4''' | ||
| − | + | - The Map options to show or hide waypoints, airspaces and other widgets such as NOTAM, METAR and obstacles are managed from the Map TAB.<br/> | |
<br/> | <br/> | ||
[[File:tip4_mac.jpg]] | [[File:tip4_mac.jpg]] | ||
| + | <!--T:5--> | ||
* '''TIP 5''' | * '''TIP 5''' | ||
| − | + | - You can enter the ID of the waypoint you wish to add to the route in the search field.<br/> | |
<br/> | <br/> | ||
[[File:tip5_mac.jpg]] | [[File:tip5_mac.jpg]] | ||
| + | <!--T:6--> | ||
* '''TIP 6''' | * '''TIP 6''' | ||
| − | + | - You can right-click on the moving map to reach various options.<br/> | |
<br/> | <br/> | ||
[[File:tip6_mac.jpg]] | [[File:tip6_mac.jpg]] | ||
| + | <!--T:7--> | ||
* '''TIP 7''' | * '''TIP 7''' | ||
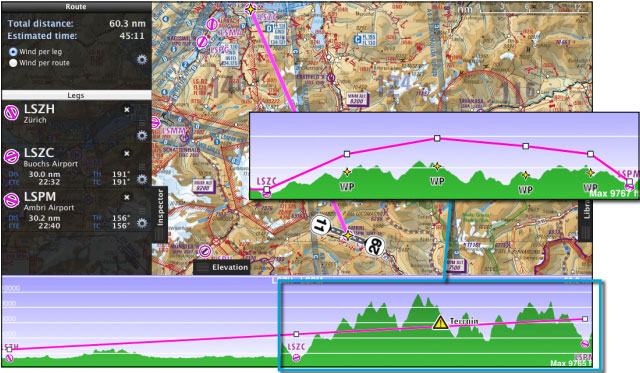
| − | + | - When terrain is an obstacle for our route, we can add mid waypoints in the Elevation graph making a click on the problematic area directly in the graph.<br/> | |
<br/> | <br/> | ||
[[File:tip7_mac.jpg]] | [[File:tip7_mac.jpg]] | ||
| + | <!--T:8--> | ||
* '''TIP 8''' | * '''TIP 8''' | ||
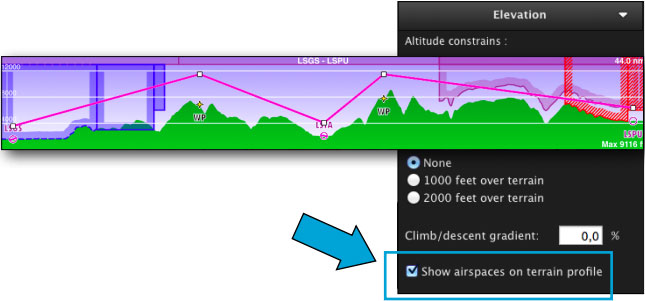
| − | + | - You can show or hide airspaces in the Elevation Graph from the Map TAB.<br/> | |
<br/> | <br/> | ||
[[File:tip8_mac.jpg]] | [[File:tip8_mac.jpg]] | ||
| + | <!--T:9--> | ||
* '''TIP 9''' | * '''TIP 9''' | ||
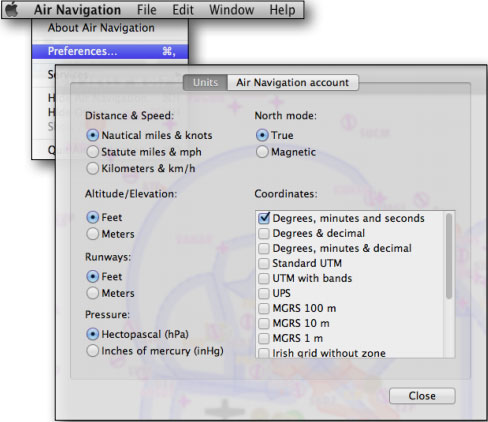
| − | + | - Units can be configured from the '''«Preferences»''' module under under '''«File»''' top menu.<br/> | |
<br/> | <br/> | ||
[[File:tip9_mac.jpg]] | [[File:tip9_mac.jpg]] | ||
| + | <!--T:10--> | ||
* '''TIP 10''' | * '''TIP 10''' | ||
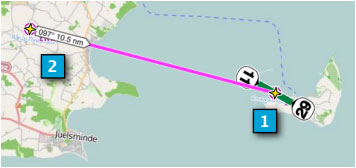
| − | + | - You can enable some useful widgets from the Map TAB.<br/> | |
<br/> | <br/> | ||
[[File:tip10.jpg]] | [[File:tip10.jpg]] | ||
[[File:tip11.jpg]] | [[File:tip11.jpg]] | ||
| + | <!--T:11--> | ||
* '''TIP 11''' | * '''TIP 11''' | ||
| − | + | - The wheel symbol at top of the menus have useful options to check out.<br/> | |
<br/> | <br/> | ||
[[File:111.jpg|left|230px]][[File:112.jpg|right|230px]] | [[File:111.jpg|left|230px]][[File:112.jpg|right|230px]] | ||
| Line 67: | Line 81: | ||
| + | <!--T:12--> | ||
* '''TIP 12''' | * '''TIP 12''' | ||
| − | + | - If you do not want to show all the contact frequencies when you print your flight out, you can uncheck them from the waypoint info window.<br/> | |
<br/> | <br/> | ||
[[File:123.jpg]] | [[File:123.jpg]] | ||
| + | <!--T:13--> | ||
---- | ---- | ||
<br/> | <br/> | ||
Back to <u>[[Air Navigation Desktop|index]]</u> | Back to <u>[[Air Navigation Desktop|index]]</u> | ||
| + | <br /> | ||
| + | </translate> | ||
Latest revision as of 22:11, 15 October 2015
In this article, we will describe some useful tips to be taken into account for when you are flight planning.
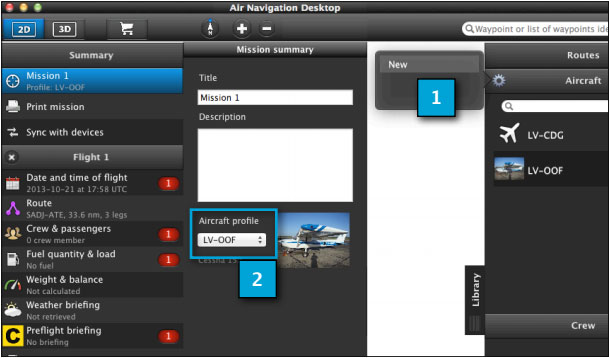
- TIP 1
- Before creating a route, we always recommend to:
- Create an Aircraft profile
- Assign it to the current Mission.
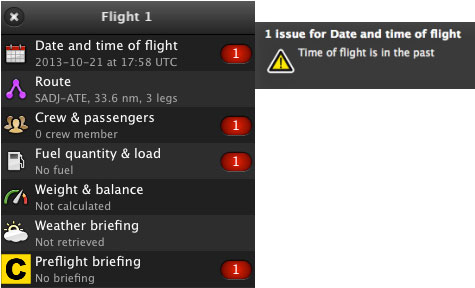
- TIP 2
- Always check the red bubbles for each module of a flight. They will give you information about the problem.
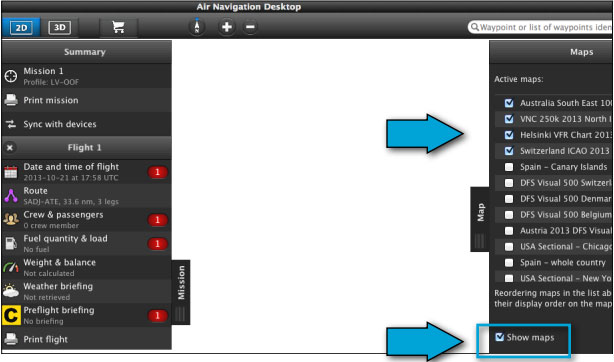
- TIP 3
- Check that your downloaded map is enabled under the Map TAB.
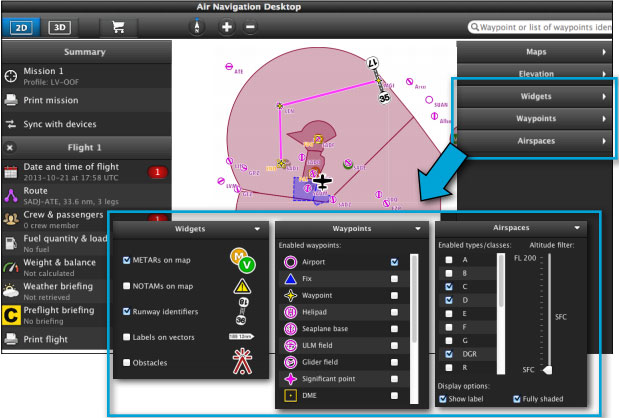
- TIP 4
- The Map options to show or hide waypoints, airspaces and other widgets such as NOTAM, METAR and obstacles are managed from the Map TAB.
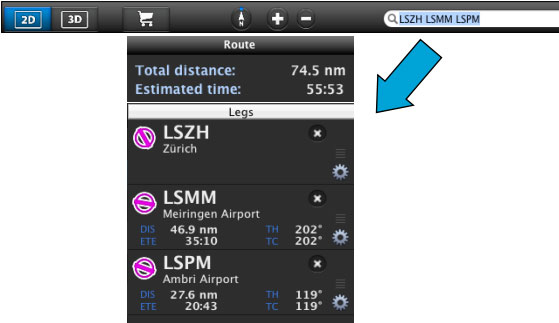
- TIP 5
- You can enter the ID of the waypoint you wish to add to the route in the search field.
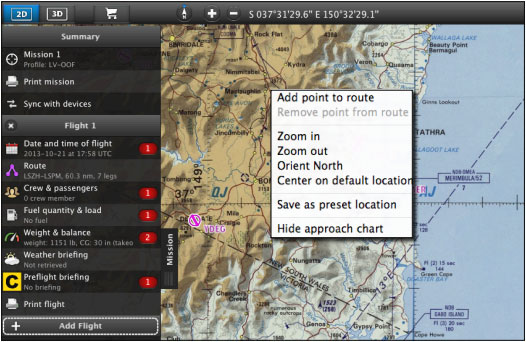
- TIP 6
- You can right-click on the moving map to reach various options.
- TIP 7
- When terrain is an obstacle for our route, we can add mid waypoints in the Elevation graph making a click on the problematic area directly in the graph.
- TIP 8
- You can show or hide airspaces in the Elevation Graph from the Map TAB.
- TIP 9
- Units can be configured from the «Preferences» module under under «File» top menu.
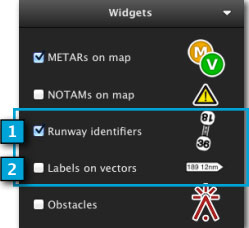
- TIP 10
- You can enable some useful widgets from the Map TAB.
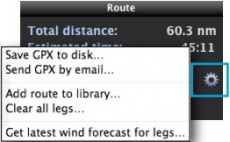
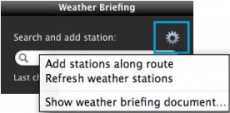
- TIP 11
- The wheel symbol at top of the menus have useful options to check out.
- TIP 12
- If you do not want to show all the contact frequencies when you print your flight out, you can uncheck them from the waypoint info window.

Back to index
