(Created page with "===Ajustes de trazo===") |
|||
| (10 intermediate revisions by the same user not shown) | |||
| Line 7: | Line 7: | ||
===Grabar vuelo=== | ===Grabar vuelo=== | ||
| − | + | En el menu "Grabar vuelo" podrá compartir sus vuelos, mostrarlos en la carta de fondo, ver aquellos que fueron grabados y mucho más. | |
| − | [[File:Flight_recorder_1.jpg|220px]][[File: | + | [[File:Flight_recorder_1.jpg|220px]] |
| + | [[File:image1.jpg|183px]] | ||
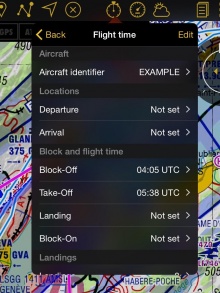
[[File:Flight_time_2.jpg|220px|left|caption]]Air Navigation empezará a grabar tan pronto la hora del Rodaje sea establecida. Para más información consulte el artículo <u>[[Flight parameters/es|«Parámetros de vuelo».]]</u> | [[File:Flight_time_2.jpg|220px|left|caption]]Air Navigation empezará a grabar tan pronto la hora del Rodaje sea establecida. Para más información consulte el artículo <u>[[Flight parameters/es|«Parámetros de vuelo».]]</u> | ||
| − | Cuando '''la hora del Rodaje''' esté finalmente | + | Cuando '''la hora del Rodaje''' esté finalmente establecida, Air Navigation dejará de grabar el vuelo y será automáticamente almacenado en el menú de «Herramientas». |
| Line 21: | Line 22: | ||
| − | Recuerde que es posible ingresar los valores manualmente, o que pueden ser establecidos automáticamente | + | Recuerde que es posible ingresar los valores manualmente, o que pueden ser establecidos automáticamente. |
El vuelo puede ser reproducido desde la aplicación presionando en el vuelo deseado desde el menú «Herramientas», donde los mismos son almacenados. | El vuelo puede ser reproducido desde la aplicación presionando en el vuelo deseado desde el menú «Herramientas», donde los mismos son almacenados. | ||
| Line 33: | Line 34: | ||
===Ajustes de trazo=== | ===Ajustes de trazo=== | ||
| − | + | Este menú está dividido en dos secciones: | |
| − | * | + | * Mostrar trazo: puede ocultar o exhibir el recorrido mientras se graba o durante la reproducción del mismo. |
| − | * | + | * Color de trazo: es posible configurarlo utilizando diferentes criterios (altitud, velocidad horizontal o vertical). Si la opción "Estándar" se encuentra activada, el recorrido aparecerá en blanco. |
---- | ---- | ||
===Misc=== | ===Misc=== | ||
| − | Tap on "hide all traces" to hide them from the | + | Tap on "hide all traces" to hide them from the moving map. |
---- | ---- | ||
===Recorded Flights=== | ===Recorded Flights=== | ||
| Line 47: | Line 48: | ||
===Options=== | ===Options=== | ||
| − | When tapping on a flight you will be given different | + | When tapping on a flight you will be given different options: |
| − | ; | + | ;Show recorded flight |
| − | :Will replay the flight on the | + | :Displays the trace of the recording on the moving map. |
| + | ;Replay this flight | ||
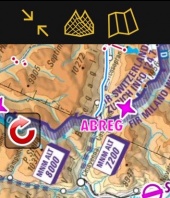
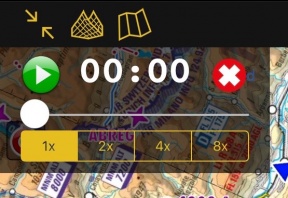
| + | :Will replay the flight on the moving map. By tapping on the red arrow on the left margin of the moving map you can restart the replay, pause it, change the replay speed, slide through it and cancel it. | ||
[[File:Flight_replay_1.jpg|170px]][[File:Flight_replay_2.jpg|288px]] | [[File:Flight_replay_1.jpg|170px]][[File:Flight_replay_2.jpg|288px]] | ||
| − | ;Share | + | ;Share on the web |
| − | + | ||
| − | + | ||
| − | + | ||
| − | + | ||
:Adds the flight to the Xample Services Live Tracking. Notice you need to be connected to your account under "Tools" - "Air Navigation Services" for this feature to work. | :Adds the flight to the Xample Services Live Tracking. Notice you need to be connected to your account under "Tools" - "Air Navigation Services" for this feature to work. | ||
| + | ;Share as KML | ||
| + | :Share will open the iOS Sharebox. You can share your route via AirDrop, iOS Native apps (Message, Mail, Notes) or third party apps like Dropbox. | ||
---- | ---- | ||
===Importar archivos GPX en Google Earth/Maps=== | ===Importar archivos GPX en Google Earth/Maps=== | ||
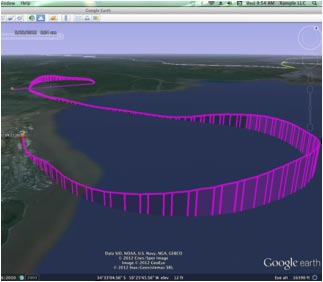
| − | Un archivo KML será almacenado en una de las carpetas de Air Navigation. Este archivo puede ser descargado desde el WebServer | + | Un archivo KML será almacenado en una de las carpetas de Air Navigation. Este archivo puede ser descargado desde el WebServer para ser abierto en Google Earth/Maps y ver el recorrido del vuelo (referirse a <u>[[Webserver/es |«Webserver»]]</u> para más información sobre cómo conectarse al Webserver). |
[[File:record4.jpg|center]] | [[File:record4.jpg|center]] | ||
| Line 69: | Line 70: | ||
Volver a la <u>[[Tools/es | página anterior.]]</u> | Volver a la <u>[[Tools/es | página anterior.]]</u> | ||
<br /> | <br /> | ||
| − | [[Category: | + | [[Category:Herramientas]] |
Latest revision as of 14:48, 5 August 2017
Contents
Grabar vuelo
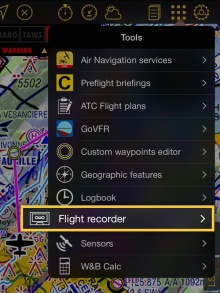
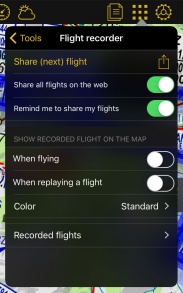
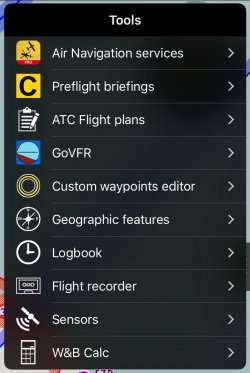
En el menu "Grabar vuelo" podrá compartir sus vuelos, mostrarlos en la carta de fondo, ver aquellos que fueron grabados y mucho más.
Cuando la hora del Rodaje esté finalmente establecida, Air Navigation dejará de grabar el vuelo y será automáticamente almacenado en el menú de «Herramientas».
Recuerde que es posible ingresar los valores manualmente, o que pueden ser establecidos automáticamente.
El vuelo puede ser reproducido desde la aplicación presionando en el vuelo deseado desde el menú «Herramientas», donde los mismos son almacenados.
Ajustes de trazo
Este menú está dividido en dos secciones:
- Mostrar trazo: puede ocultar o exhibir el recorrido mientras se graba o durante la reproducción del mismo.
- Color de trazo: es posible configurarlo utilizando diferentes criterios (altitud, velocidad horizontal o vertical). Si la opción "Estándar" se encuentra activada, el recorrido aparecerá en blanco.
Misc
Tap on "hide all traces" to hide them from the moving map.
Recorded Flights
Air Navigation Pro will order the recordings chronologically. Each record will show departure, arrival, duration, date and time.
Options
When tapping on a flight you will be given different options:
- Show recorded flight
- Displays the trace of the recording on the moving map.
- Replay this flight
- Will replay the flight on the moving map. By tapping on the red arrow on the left margin of the moving map you can restart the replay, pause it, change the replay speed, slide through it and cancel it.
- Share on the web
- Adds the flight to the Xample Services Live Tracking. Notice you need to be connected to your account under "Tools" - "Air Navigation Services" for this feature to work.
- Share as KML
- Share will open the iOS Sharebox. You can share your route via AirDrop, iOS Native apps (Message, Mail, Notes) or third party apps like Dropbox.
Importar archivos GPX en Google Earth/Maps
Un archivo KML será almacenado en una de las carpetas de Air Navigation. Este archivo puede ser descargado desde el WebServer para ser abierto en Google Earth/Maps y ver el recorrido del vuelo (referirse a «Webserver» para más información sobre cómo conectarse al Webserver).
Volver a la página anterior.
