(Importing a new version from external source) |
(Importing a new version from external source) |
||
| Line 12: | Line 12: | ||
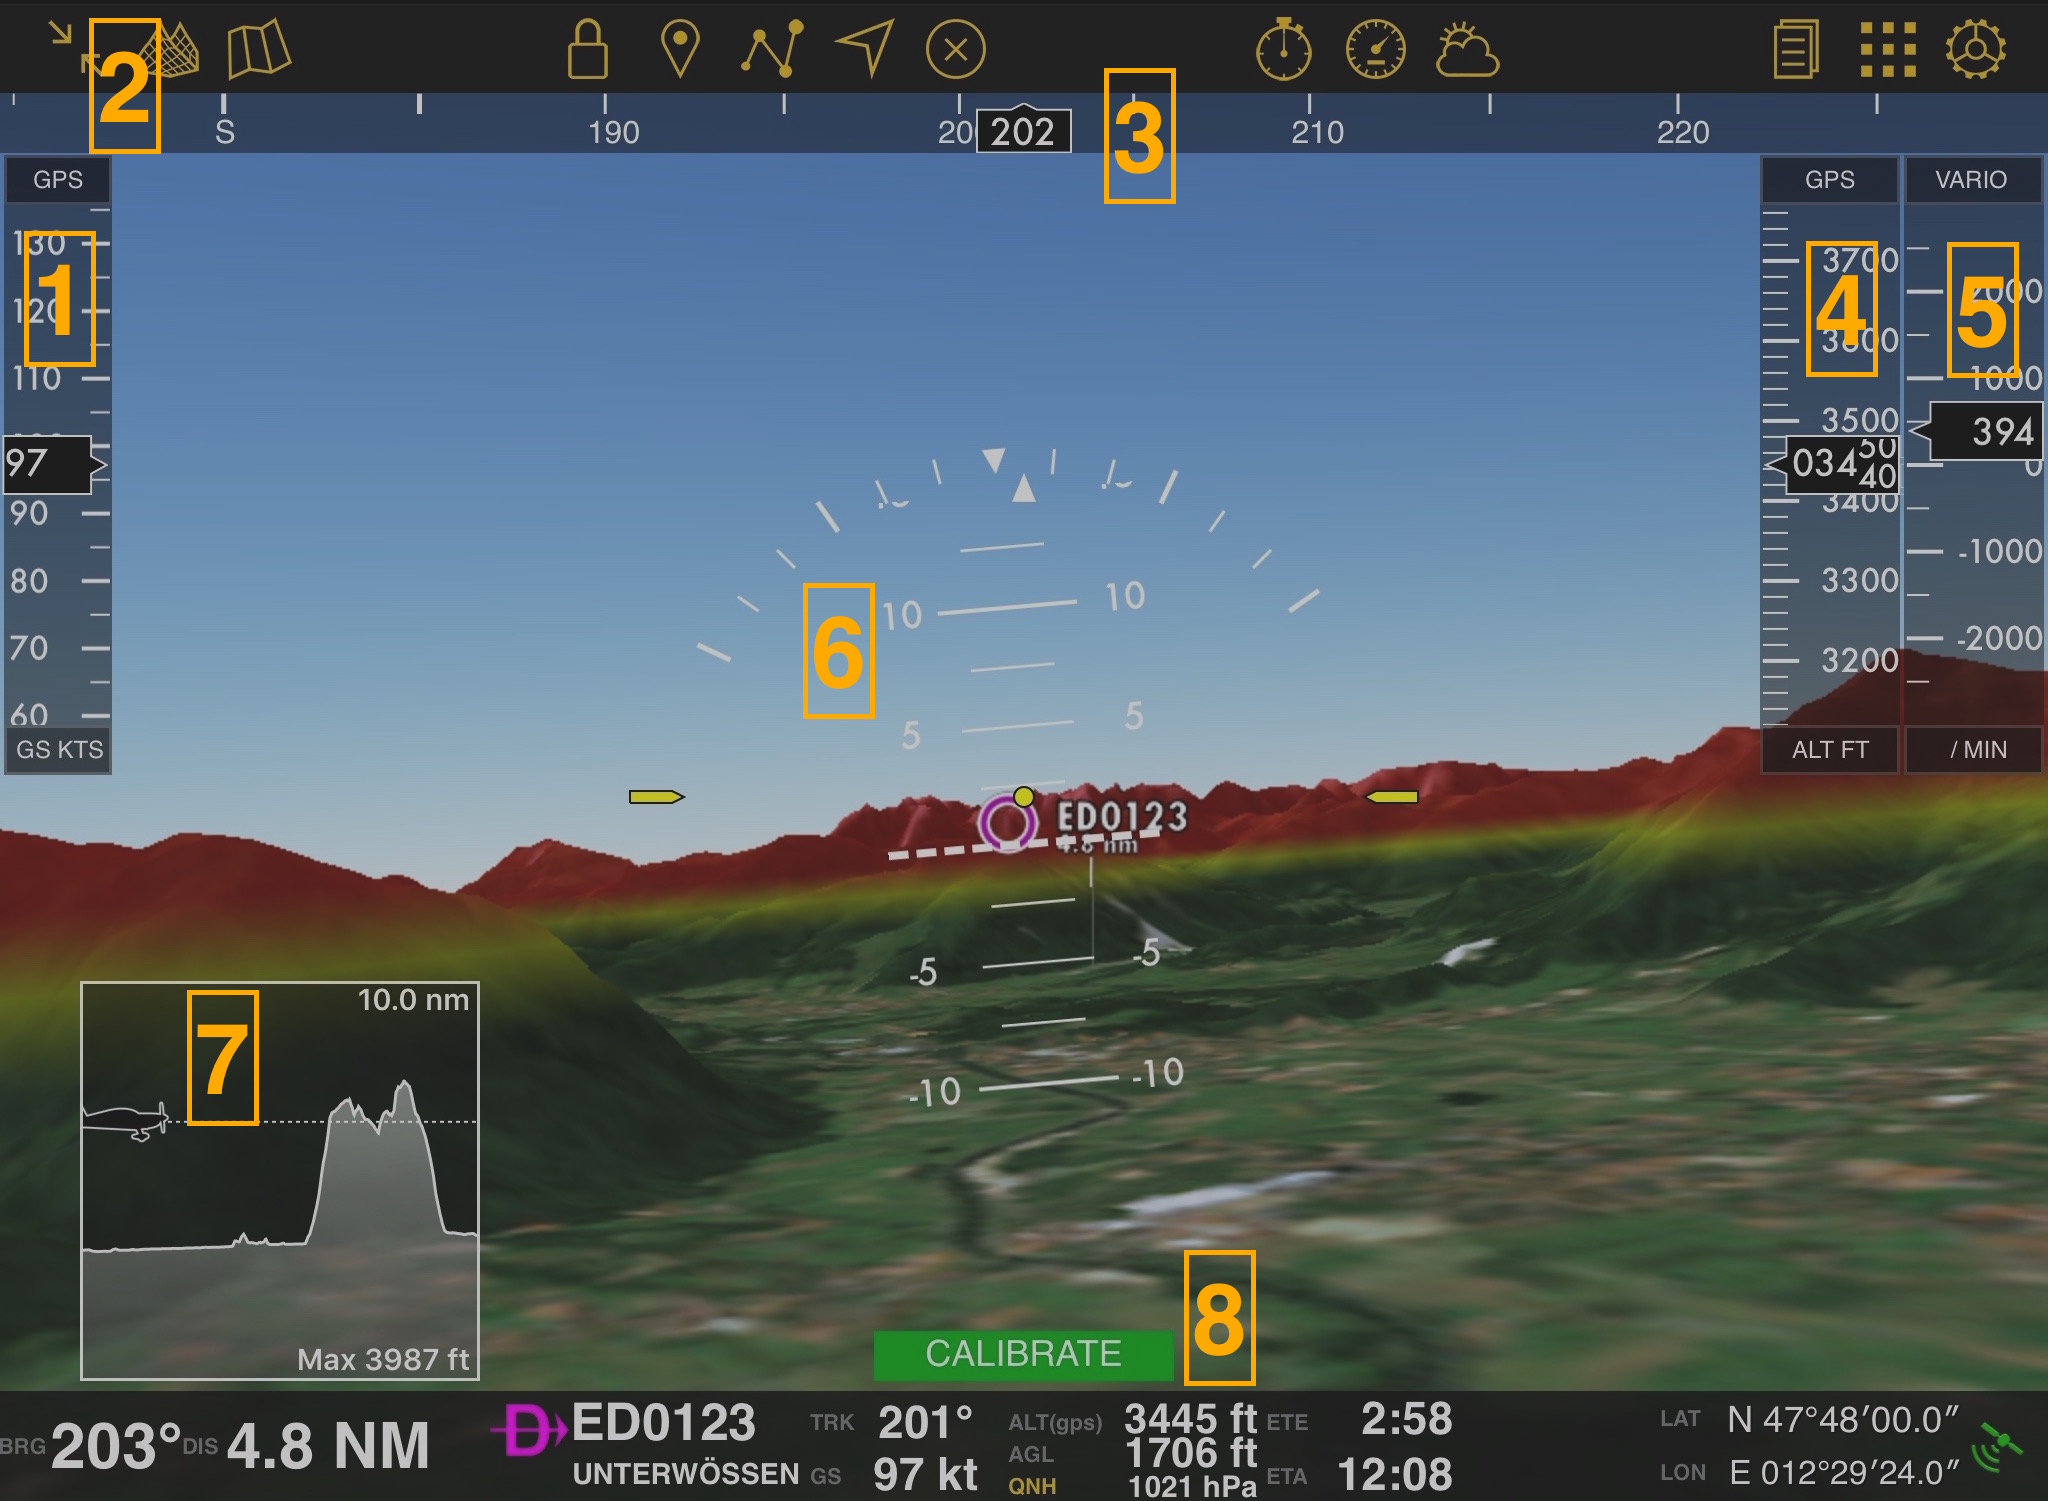
[[File:3d.jpg|right|caption]]In order to get into the EFIS module, you will first need to activate the previously installed 3D map of your choice and press the button of the EFIS module, which you can find in the top tool bar. | [[File:3d.jpg|right|caption]]In order to get into the EFIS module, you will first need to activate the previously installed 3D map of your choice and press the button of the EFIS module, which you can find in the top tool bar. | ||
<br /> | <br /> | ||
| − | + | ;# Groundspeed indicator | |
| − | + | ;# Retract button / Expand button <nowiki>*</nowiki> | |
| + | ;# Heading indicator | ||
| + | ;# Altitude indicator | ||
| + | ;# Attitude indicator | ||
| + | ;# Elevation profile | ||
| + | ;# Status button | ||
<nowiki>*</nowiki> When pressing the retract button you'll be able to see the route and the moving map on the left side. To hide these, just press the expand button. | <nowiki>*</nowiki> When pressing the retract button you'll be able to see the route and the moving map on the left side. To hide these, just press the expand button. | ||
Revision as of 18:34, 15 April 2016
The EFIS module is a graphic interface which displays real 3D terrain while flying. In order to use it, you will first need to download the 3D data from the Map Store. This is a complex piece of data and it works for both the EFIS module and the Elevation Graph. So this means that once you have installed it in Air Navigation Pro, you won’t need to install the Free Elevation data.
Overview
In order to get into the EFIS module, you will first need to activate the previously installed 3D map of your choice and press the button of the EFIS module, which you can find in the top tool bar.
- Groundspeed indicator
- Retract button / Expand button *
- Heading indicator
- Altitude indicator
- Attitude indicator
- Elevation profile
- Status button
* When pressing the retract button you'll be able to see the route and the moving map on the left side. To hide these, just press the expand button.
Different modes and calibration
You might see the following:
![]() Will be displayed when touching the Edit Mode button.
Will be displayed when touching the Edit Mode button.
You can freely navigate throughout the terrain in this mode:
- Touching the screen and dragging up or down will change the pitch.
- Touching the screen and dragging left or right will change the heading.
- Touching the altitude bar and dragging up or down will change the altitude.
- By touching on the left edge of the EFIS and dragging up or down you can move forward or backwards
![]() Press it and a menu will open. You will be able to calibrate the attitude and the offset.
Press it and a menu will open. You will be able to calibrate the attitude and the offset.
![]() This will show when using an AHRS G mini gadget.
This will show when using an AHRS G mini gadget.
![]() You will show when using Air Navigation Pro with X-Plane.
You will show when using Air Navigation Pro with X-Plane.
![]() You will show it when using Air Navigation Pro with FSX.
You will show it when using Air Navigation Pro with FSX.
Troubleshooting
- The attitude is freezed and there is a red button with the message "Attitude OFF".
- It's possible that the internal gyroscope is turned off or there is no connection to the external AHRS sensor. Make sure to activate them through "Tools - Sensors" under the sub-menu "Attitude Sources".
Back to previous page.

